How to record a talking head video on your phone
· 6 min read
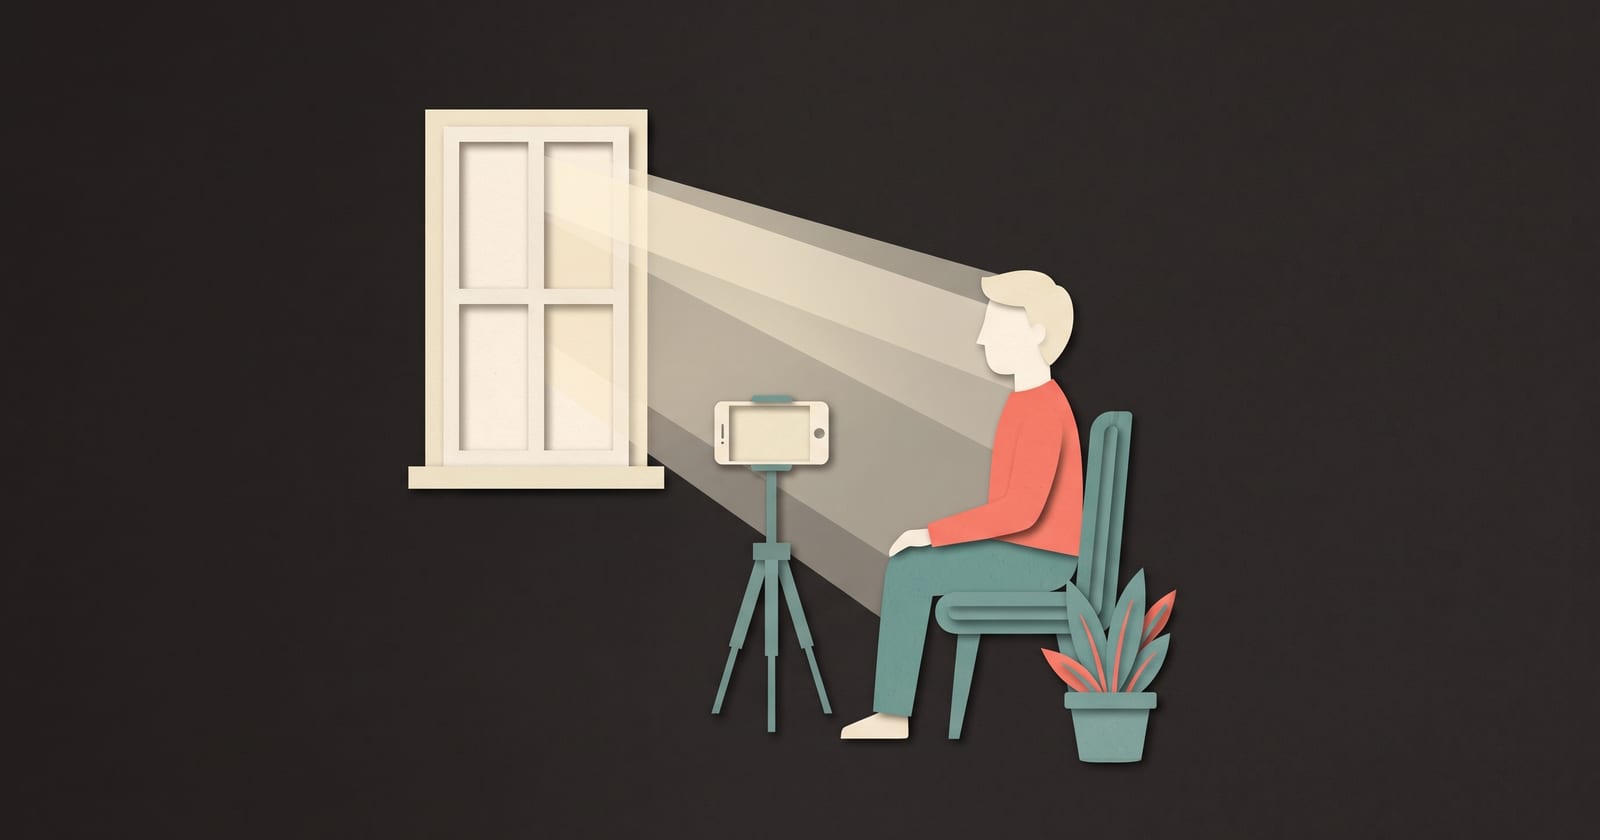
To record a good talking head video on a phone, sit facing a window, put the phone at eye level about an arm's length to a metre away, frame yourself from the chest up with your eyes about a third of the way down the frame, and record in a quiet room with soft furnishings. Use 1080p at 30 frames per second, lock the focus and exposure on your face, and wipe the lens. Then record ten seconds and check it before you do the real thing.
None of this needs equipment beyond the phone, a stack of books and a window. A small clip-on mic is the one purchase worth making.
The setup at a glance
| What | Do this | Avoid this |
|---|---|---|
| Light | Face a window, or have it slightly to one side | A window behind you, or only a ceiling light |
| Camera height | Lens at eye level or slightly above | Phone on the desk looking up at you |
| Distance | About 60 cm to 1 m for a chest-up shot | Phone close to your face (it widens your nose) |
| Framing (9:16) | Chest up, eyes a third from the top | Lots of empty space above your head |
| Background | One to two metres behind you, tidy, something real | A blank wall right behind your head |
| Sound | Quiet room with curtains, a sofa, a rug | Kitchens, bathrooms, rooms that echo |
| Settings | 1080p, 30 fps, focus and exposure locked | Beauty filters, auto exposure hunting |
1. Light: face the window
Light decides whether a phone video looks cheap or clean. The best light you have is free: a window during the day, with you facing it.
- Face it, or turn about 45 degrees from it. Light straight on is flat but flattering. Light from slightly to one side gives the face some shape. Either is good.
- Never sit with the window behind you. The phone exposes for the bright window and turns you into a silhouette.
- Avoid a ceiling light on its own. Light from directly above puts shadows under the eyes and the nose.
- At night, use a lamp with a shade next to the phone, at about head height, and turn off the ceiling light. One soft source beats three harsh ones.
- Don't mix colours. A warm bulb on one side and blue daylight on the other gives you a face that is two colours. Pick one and switch the other off.
Check it on the screen: you should see both eyes clearly, with a small reflection of the light in each.
2. Camera: eye level, a little further away than feels natural
Put the lens at eye level or a touch above. A phone lying on the desk looks up your nose; a phone held high looks down on you. A tripod with a phone clamp is cheap, but a stack of books does the same job.
Distance matters more than people expect. Phone lenses are wide, so close up they exaggerate whatever is nearest the lens, usually the nose. For a chest-up vertical shot, about 60 centimetres to a metre away looks natural.
The back camera on most phones is sharper and better in low light than the front one. The front camera lets you see yourself and read your lines. In good daylight the front camera is fine, and being able to check your framing is usually worth more than the extra sharpness.
3. Framing a 9:16 shot
For vertical video, frame from the chest up, with your eyes about a third of the way down from the top of the frame. Leave a little room above your head, not a lot.
Then think about what the app will put on top of your video. On Reels, TikTok and Shorts, the bottom fifth of the frame holds the caption and account name, and the right edge holds the buttons. Keep your face and hands out of those areas, and leave space under your chin for the captions. Word-by-word captions covers where text sits safely.
Behind you, aim for one to two metres of depth: a shelf, a plant, a lamp that's switched on. A wall right behind your head looks flat and throws your shadow onto it.
4. Sound: the part people notice most
If you can only fix one thing, fix the sound: a slightly soft picture is easy to watch, but echoey or muffled speech is hard work. The fixes are mostly about the room:
- Choose a room with soft things in it. Curtains, a sofa, a rug, a bed. They soak up echo. Kitchens and bathrooms, all hard surfaces, sound hollow.
- Turn off what hums. Fans, heaters, air conditioning, a dishwasher in the next room. You stop hearing them after a minute; the microphone doesn't.
- Get the microphone closer. The phone's own mic is decent within about a metre. A clip-on mic, wired or wireless, about a hand's width below your chin is much better.
- Put the phone on silent. A notification sound in the middle of your best take is a retake.
Listen to your test recording with headphones. If you can hear the room, move rooms or add something soft.
5. Settings
- 1080p at 30 frames per second. That's plenty for social video. 4K makes huge files that get compressed on upload anyway.
- Lock focus and exposure. On most phones you tap and hold on your face in the camera app. Otherwise the picture brightens and darkens every time you move.
- Clean the lens. Phone lenses live in pockets. A smudge makes everything look hazy, and it's a common cause of soft footage.
- Turn off beauty filters. They smooth away detail and can make a face look slightly unreal.
- Check battery and storage before you start, not in the middle of a good take.
6. Delivery
The setup gets you a clean picture. What keeps people watching is how you say it: look at the lens, keep lines short, record one line or scene at a time, and lift your energy a little above conversation. How to read a script on camera covers this in detail. Don't worry about stumbles while recording; the edit removes them (see how to edit a talking head video).
The ten-second test
Before the real take, record ten seconds of yourself saying your first line. Then watch it on the phone, full screen:
- Are both eyes clearly lit?
- Is the lens at eye level, with your eyes a third from the top?
- Is anything important in the bottom fifth or along the right edge?
- With headphones on, can you hear echo, hum or traffic?
- Does the picture stay the same brightness when you move your hand?
Fix whatever failed and test again. It takes two minutes and saves re-shooting the whole video.
How to do this in ThreeCut
ThreeCut records in your phone's browser, so there's no app to install. Pick the shape first (9:16, 1:1 or 16:9) and the recorder's frame shows exactly what the video will keep, so you can frame yourself for the real crop. You record one scene at a time, with the line and a short delivery note at the top of the screen, near the front camera. Each take starts with a 3, 2, 1 countdown and runs against a timer for the scene's planned length; play it back, then retake or keep it. Kept takes upload to private storage, so stay online while you record. After that, the edit and the captions are done for you. See how it works.
Common questions
Should I use the front or back camera?
The back camera is usually sharper and better in low light. The front camera lets you check your framing and read your lines. In good light the front camera is fine, and seeing yourself usually matters more for a talking head video.
What resolution should I record at for Reels and TikTok?
1080 by 1920 at 30 frames per second is plenty for vertical social video. Recording in 4K adds file size without making much difference after the platform compresses the upload.
How do I get good audio without a microphone?
Record in a room with soft furnishings, turn off anything that hums, and keep the phone within about a metre of your mouth. Then listen to a test recording with headphones before you record the real thing.
Where should I put my phone when filming myself?
At eye level, about 60 centimetres to a metre away, with a window in front of you or slightly to one side. A small tripod or a stack of books works.